This is an December 2025 update of a post that has been periodically updated over the last 13 years or so.
This post is part of our Travel Skills for Travelers Over 50 guide, which includes our best photography tips alongside packing, gear, and practical travel advice.
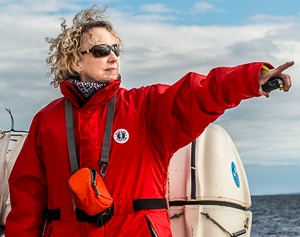
People often ask me, “What is the best camera for travel photography?”
The easy answer is: the best travel camera is the one you have with you.
However, the honest answer is complicated. I have several cameras, and the one I use on any particular day depends on what I'm shooting, how much walking I'll be doing, and where I am. Obviously, the gear you need to photograph African animals is different than what you want when you're cycling around a the French countryside or inside a spectacular Spanish cathedral.
So the real answer is: it depends. Because I use a few different setups, including my iPhone 13 Pro.
Here is the travel camera equipment I'm currently using. I recently bit the proverbial bullet, and upgraded my professional-level Nikon DSLR cameras to the Z7ii mirrorless camera body. Yes, the trusty DSLR models I've been using for years went in for trade in. (And yes, on average I got between 10 and 25 percent of what I paid for them in trade.) But such is the life and value of technology.
Unless I'm definitely going somewhere that requires all possible variables, such as the above-mentioned Africa trip or the trip to Antarctica we're currently embarking on, I usually don't carry all my gear with me. All my equipment is certainly too heavy to lug around all day, so even when I do have most of it with me, I pare it down in the morning to to what I'll actually be using that day before I start out. Sometimes, that's just one camera body and one lens, depending on what I'm after.
So, here is all the camera equipment I'm currently using as of January 2024.
Nikon Z7 ii Camera Bodies
I always carry two Nikon camera bodies. And this time I bought two identical Nikon Z7 ii camera bodies. The Z7 ii is a 45.7-megapixel full-frame camera. The full-frame sensor allows for some serious cropping without losing much detail. It's about a 30 percent improvement in file size over the Nikon D810 that I had been using. Another advantage of mirrorless cameras is that the bodies and lenses are lighter and usually smaller than their DSLR equivalent. Finally, the electronic viewfinder on mirrorless cameras eliminate a lot of exposure mistakes.
I use the second Nikon Z7 ii body for two purposes: obviously, as a backup in case the first body fails – which I've never had a Nikon camera do – and to carry another lens when I need to make a quick decision.
In Africa, I was using one body a 150-600mm zoom for most of the animals when they were far off. But occasionally, they approached our vehicle and I could quickly switch to the second body where I'd mounted a 70-300mm zoom when the 150-600 lens was too much.
Previously, I had been using two different models of Nikon DSLR, the D810 and the D750. I did that because the D750 was about $1000 cheaper than the D810. But, for some reason, those two cameras had different control buttons, and quick switching between the two was not completely automatic because of that. I'll not do that again, hence the identical Z7 ii bodies today.
See the Nikon Z7ii at BH Photo Video
Nikon Z mount zoom lenses
Normal and wide angle lenses
The workhorse focal length lenses in my kit are the Nikon 24-70mm f/2.8 and the wide angle Nikon 14-30mm, f4. There is a 14-24 Nikon lens in f2.8, but it costs about $1000 more than the slower lens. I don't think I've ever been in a spot using that wide lens where one stop of speed was critical. So, this time I went with the f4. It's also lighter, by the way.
The 24-70mm lens provides the “normal” focal lengths that you use the most. A nice wide angle at 24mm for landscapes, and the 70mm setting is just about right for a portrait. The fact that it is a constant 2.8 aperture makes it nice and bright at its entire range and also gives you the speed to shoot in lower light situations.
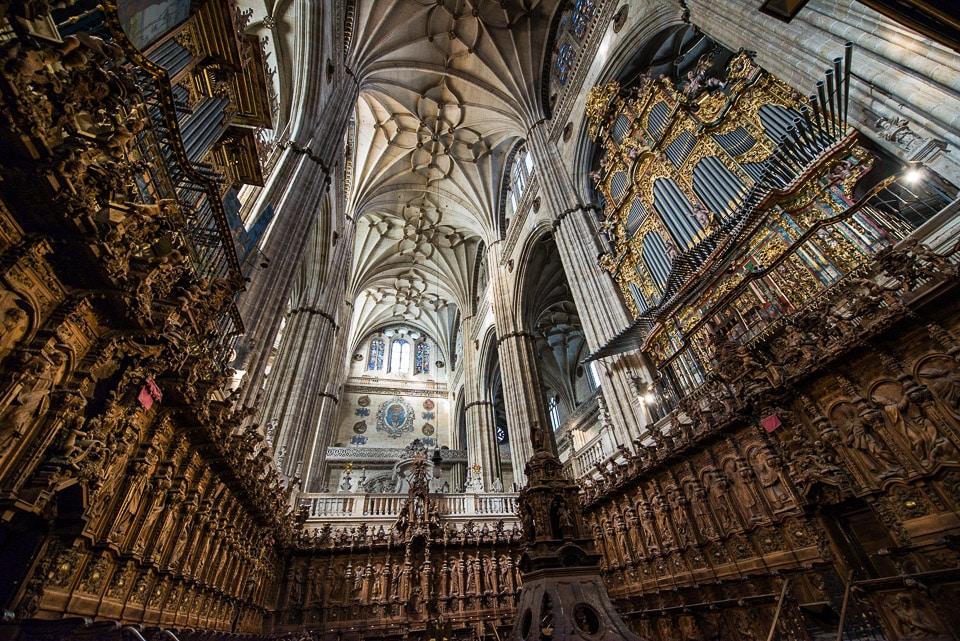
The 14-30 zoom is spectacular for wide angle landscape stuff, and because I shoot inside churches a lot, allows me to get dramatic, detailed images of the elaborate artistry of medieval cathedrals.
For example, the shot of the Spanish Cathedral of Salamanca ended up being used in a book Cathedrals: Masterpieces of Architecture, Feats of Engineering, Icons of Faith by the English architectural historian Simon Jenkins.
Telephoto zoom lenses
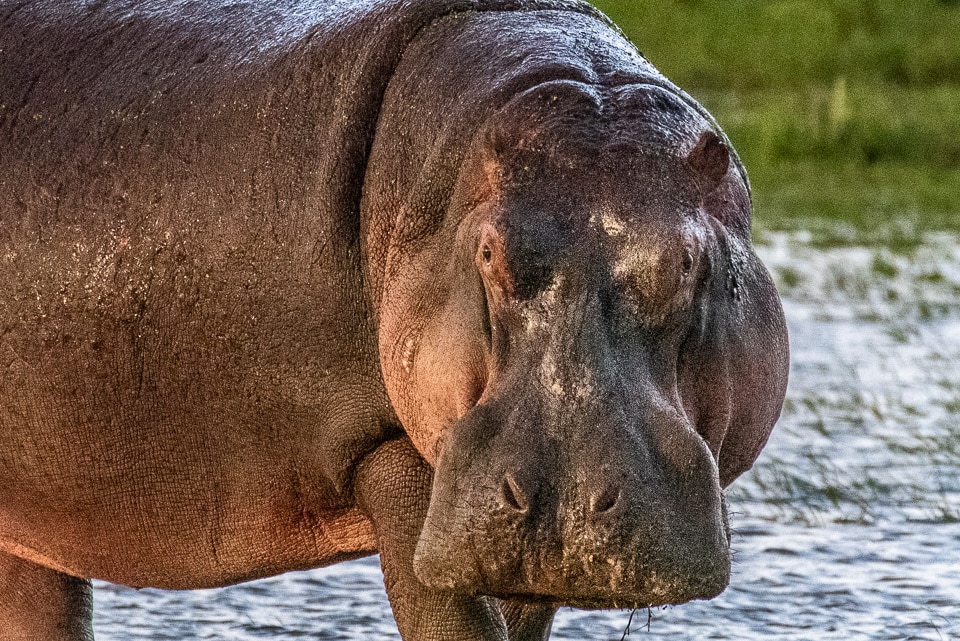
I'm now carrying two telephoto zoom lenses: the Tamron 150-500mm f5-6.7 and the Tamron 70-300 f/4.5-6.3. I should just say right now that I chose the Tamron over the equivalent Nikon lenses because of the lower price point only – and because I use them infrequently. My previous experience with Tamron lenses is that they are plenty sharp, as the hippo photo above proves, and it makes a great and less expensive alternative.
The 70-300 zoom is especially useful when your subject is a bit, but not too far away. I also should point out that it has occasional use for landscapes. It used the 70-300 lens I had at the time to take this award-winning shot of a sunset at Joshua Tree National Park.
See the Nikon 24-70mm zoom at BH Photo Video
See the Nikon 14-30mm zoom at BH Photo Video
See the Tamron 150-500mm zoom at BH Photo Video
See the Tamron 70-300mm zoom at BH Photo Video
Photography Accessories
Here are all the things, other than the cameras themselves, that you need to fill out your kit.
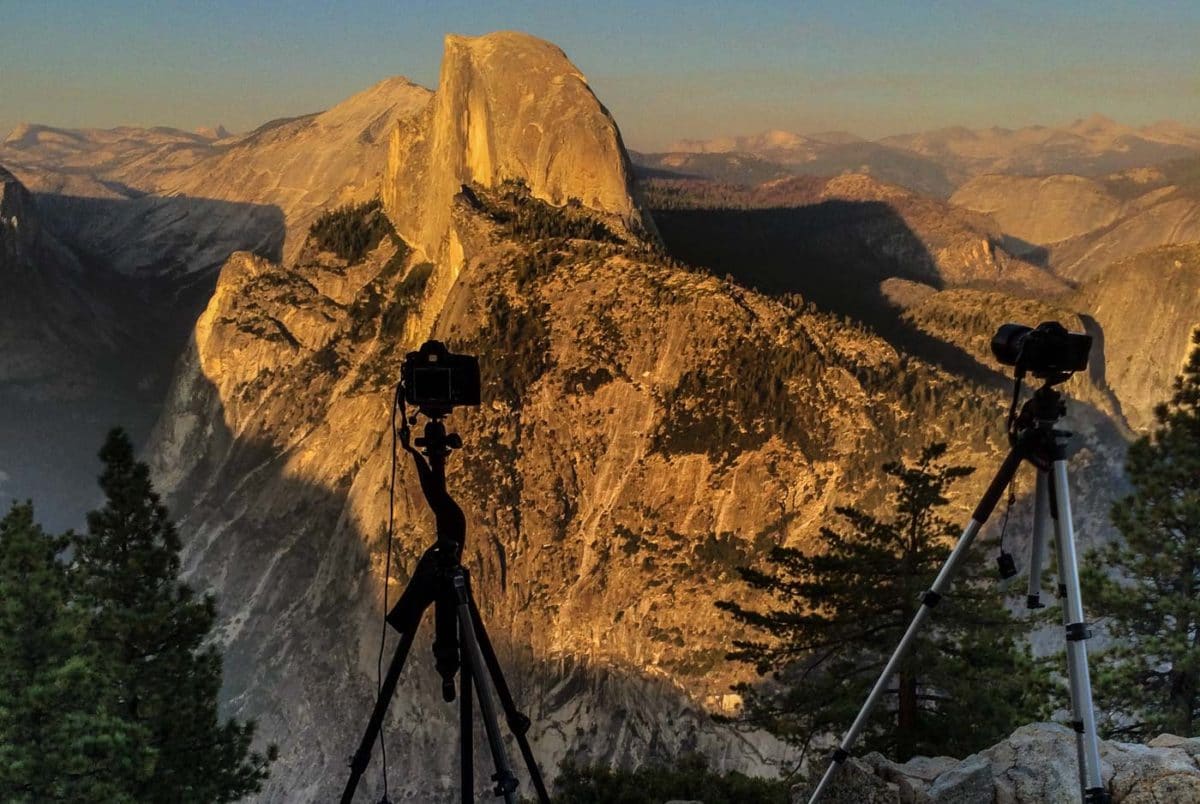
Manfrotto MT190CXPRO4 Carbon Fiber Tripod with ball head: There are many cheaper – and many more more expensive – tripods out there, but this one is a good balance of cost, weight, and stability. It's not as heavy duty as many, but, honestly, there's only been one time I felt I needed something more substantial. And that was when I was way up in the Swiss alps and a serious wind was blowing. (When that happens, by the way, hook something heavy to the bottom of the center pole to keep the tripod in place.) The ball head I use doesn't offer all the convenience of having a handle to exactly position things the way you want them, but again, it's a small compromise to save a few hundred dollars. Don't forget to get a head for the tripod. It won't work without it.
Vello Shutterboss Cable Release and Timer: If you're using a tripod, you're going to want one of these. You can use it as a timer for taking a selfie. Or for setting up a time lapse shoot for those gorgeous moving clouds. But why you'll use it the most is for image stabilization. There's no sense of mounting your camera on a tripod to eliminate camera shake, and then just reintroducing camera shake by pushing the shutter button manually. This trips the shutter electronically. That keeps things motionless. That's better, especially for a slow exposure landscape or moving water shot. Believe me on this.
The Peak Design Black Slide Camera Strap: I absolutely love this strap. I traded up to this from the Black Rapid strap I used to use because the Peak Design attaches to the camera in two spots instead of one like the Black Rapid. That means that the camera will lie flat against your hip instead of swinging and bouncing around like one that attaches at a single point. The Peak Design strap also detaches from the camera at the push of a button, which is very handy when you want to quickly mount it on your tripod or anytime you are shooting when you don't have to worry about carrying or dropping the camera. Another feature I like about this strap is the instant D-ring length adjustments
The Mind Shift Backlight 26 Liter Camera Bag: I was turned on to the Mind Shift Backlight camera bag by my friend Mark Harris. I've now been using it for five years, and, of the million or so camera bags I've tried, it's clearly the best camera bag for my purposes. First, it opens from the back, which allows you to set it down on the ground to get to your gear without getting the shoulder straps dirty. It has a dedicated tripod mount, ample inside room, a 15-inch laptop pocket, and large side pockets for your water bottle or whatever. Maybe the best feature, though, is the “daypack” attached to the front of the bag. You can stash all your other stuff there, such as an accessory or two, a rain jacket, your lunch.
Speaking of accessories, there are four accessory products I've also been using for a while to keep me organized. One is just a little clear sided The Think Tank Cable Management bag where I keep my cables and other miscellaneous parts. Another is the Mind Shift Filter Nest Mini which is a filter wallet where I put all my various polarizing filters. It's so much easier than carrying all the little plastic cases the filters came in. Third is the Think Tank Pocket Rocket wallet where I keep my extra memory cards. Fourth is the Think Tank 4 Battery holder. It's important to protect the pins on your batteries, which this does. I once ruined a $60 battery because I didn't have a padded case like this. I could have bought about four of these cases for what that battery cost.
Now remember, of course, to have plenty of memory cards and extra batteries at all times. And, if you're using a big file camera, like the Nikon Z7 ii, get the fast and large memory cards. (I'm currently using 128 gb Sandisk cards. Believe me, there's a difference.
Here are the SD cards I use in both cameras. Get three or four at least.
Here's the CF express card that the Nikon Z7 ii also uses. You'll need one of these to match each SD card.
Here are extra batteries for the Nikon. Get at least three. There have been days when I wish I'd had four.
I use a photo storage and sharing service called Smugmug, too. There you can organize, display, store and share your photos. If you buy certain programs, you can even allow people to buy prints or digital versions of your photos. Please click here to see my photos at Smugmug, or here to sign up for your own plan. It's worth it.
Finally, I use Adobe Lightroom to both edit photos and organize them. The recent addition of AI editing capabilities to Lightroom really speeds up the editing process a lot. I also use the free Adobe Express photo size editor to quickly size photos I want to post in the blog or send to friends.
Why BH Photo and Video?
Although your local camera store probably has knowledgeable staff that can help you choose the right camera for you, BH is the place the pros shop. I know lots of professional photographers, and nearly all of them buy from BH. Why, because the staff at BH, who are easy to reach on the phone, are simply the most expert in all aspects of camera and audio-visual equipment. Give them a call and give them a test with any questions you might have. Or, next time you are in New York City, stop in the store. No pretensions at all, just the straight dope.
Also, because of BH's volume, they usually have the best prices. And, if you use their Payboo credit card, they'll pay the sales tax in whatever state you're in. That's hard to beat.
Warning, one quirk you sometimes have to work around: BH is closed for the Jewish sabbath every week and for all Jewish holidays.
If you're in Australia, check out C. R Kennedy Photo Imaging.
This post is part of our Travel Skills for Travelers Over 50 guide, which includes our best photography tips alongside packing, gear, and practical travel advice.
I get asked what camera I use all the time and I have to confess that it is just a point and shoot. One day I’m going to set aside the time to learn to use something more sophisticated. In the meantime there is always Photoshop – lol!
Take my word for it, Lyn, it’s a lot easier to get it close to right in the original image than to try to fix it later in Photoshop.
I guess we need to invest in this kind of camera, especially since we are always traveling. It’s great to keep memories with equally great photos and videos right?
It depends a lot on what you’re trying to achieve. There’s a learning curve with pro level cameras and you’ll have to invest a lot of time, as well as money.
I guess you’re not that much over fifty. The variable aperture 70-300 just isn’t bright enough for me … I can use it, but it’s not a pleasant experience. Choosing between the extra weight of a 70-200 f/2.8 and the dark 6.3 (at the long end) I’ll suck it up and carry the 70-200.
I’m more concerned about the weight of the 70-200 f/2.8’s price, which is, as I recall, about $1500 higher.