
Here are a few rules I try to follow to make good photos. Many, not all, of these tips are based on using an actual camera that has exposure and focus controls. While phone cameras these days are great (and I'm using mine more and more) sometimes only a “real” camera will do. If you have one of those and would like to know the basics of how to use it, this article is for you.
I hope the tips are helpful.
Note: this post was updated April 2026.
This post is part of our Travel Skills for Travelers Over 50 guide, which includes our best photography tips alongside packing, gear, and practical travel advice.
1. Get close.
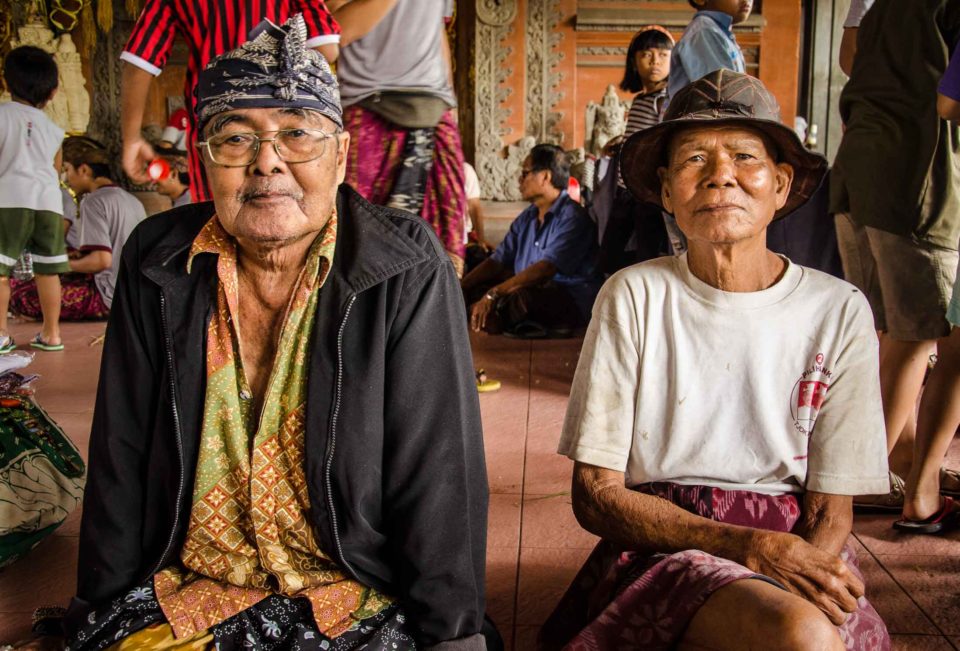
If you are shooting people, closer is better. Sometimes it’s a bit intimidating to walk right up to someone and push a camera in their face. I find it’s a good idea to have a story to go along with your pushiness. Mine often starts with, “I’m a photo journalist, and I’m working on a story about … Do you mind if I take your picture?” It works.
2. Get on the appropriate level.
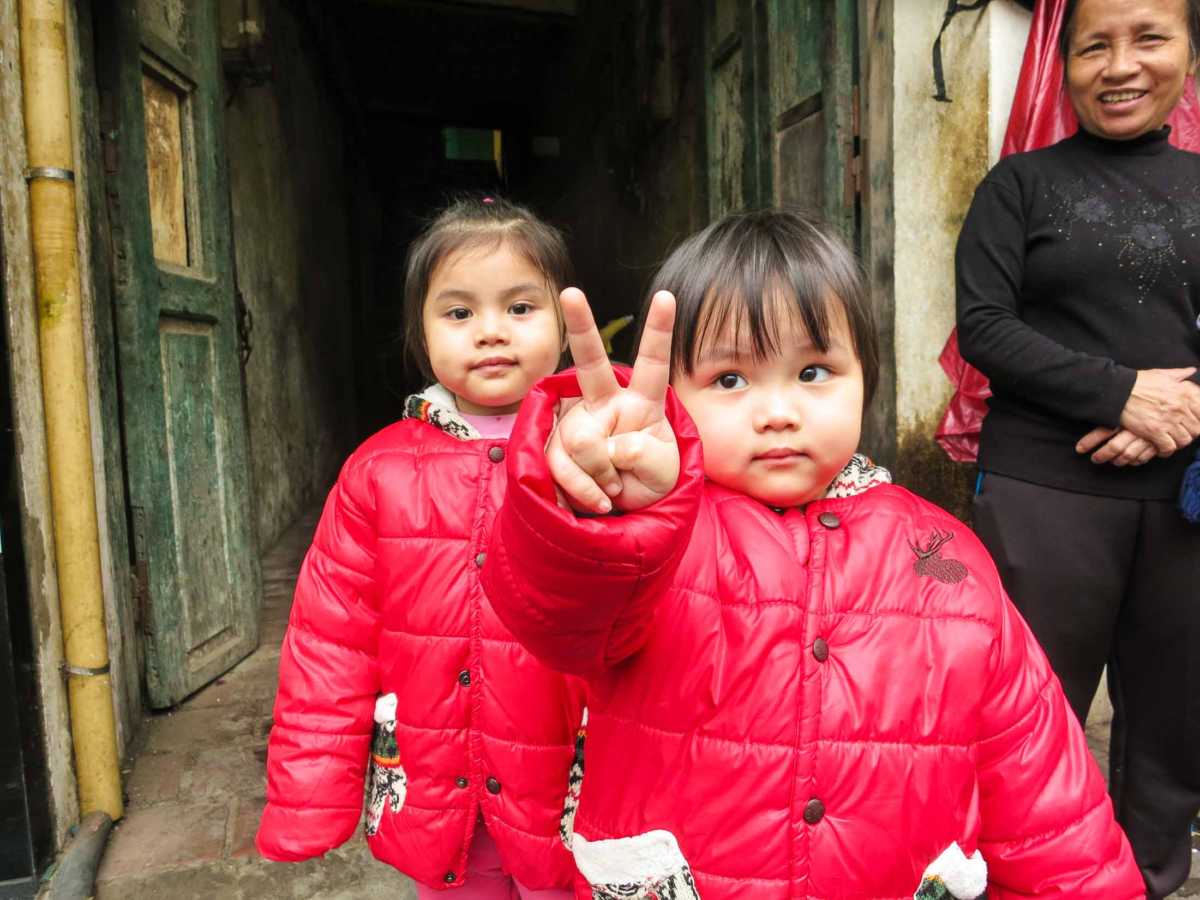
If you’re shooting adults, you can stand. But if you’re shooting children, squat. You’ll get more interaction, and a photo from their perspective is just more interesting.
3. Wean yourself from the Auto setting.
If you’re on auto, you’re asking for all sorts of problems, such as bad focus, bad exposure, bad color balance, wrong depth of field, etc. Read your camera’s manual and experiment with the various settings until you can do them automatically–and appropriately for the setting you’re in. A very good half-way measure is to select either aperture priority or shutter speed priority. Choose one based on what you are shooting. If you're on the street, you might want to select a medium aperture so that you will have depth of field in case you (or your camera) isn't exactly focused on your main subject. Select shutter priority if you, or your subject, is moving, in order to stop or blur the action, as your vision dictates.

4. Select your shutter speed.
Basically, there are two ways to control exposure: shutter speed and lens aperture. They are reciprocal. In other words, one click faster exposure equals one click more open on the aperture. But, they are not completely interchangeable. A faster or slower shutter speed might be appropriate for what you are shooting. Do you want to stop action, such as when you’re shooting sports? Or do you want to soften and convey motion, if you’re shooting moving water? Then control your shutter speed for the effect you want.
5. Select your aperture.
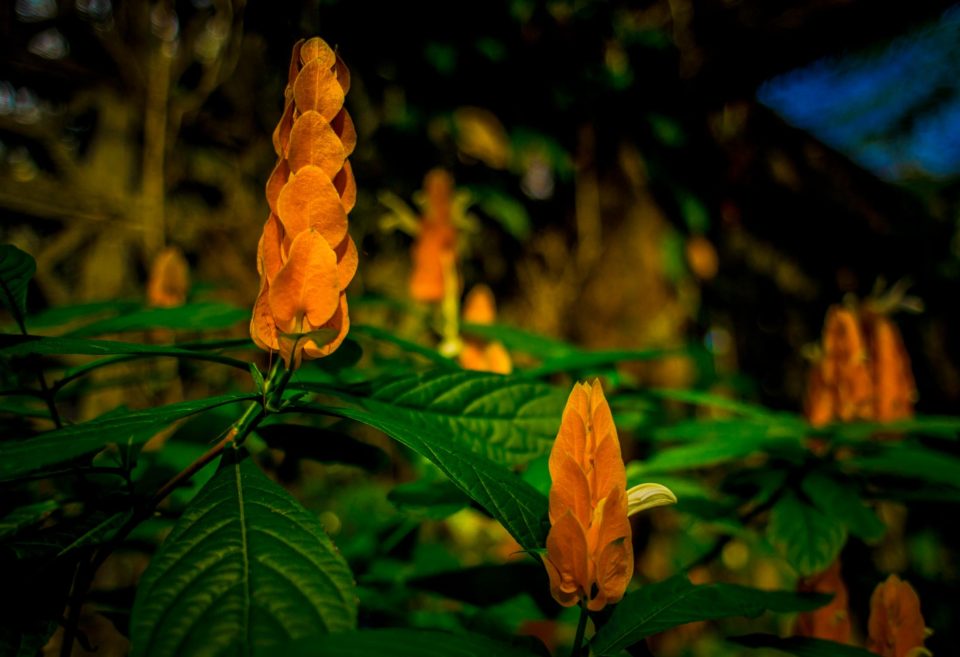
Along with exposure, aperture selection also controls your depth of field, i.e. the amount of your frame which is in focus. If you are shooting a landscape, you probably want to select a smaller aperture, which will give you a larger depth of field. Your entire frame will be in focus. However, if you’re shooting a portrait against a busy background, select a wide open aperture to throw the distracting background out of focus.
6. Use the “Rule of Thirds.”
Imagine drawing lines dividing your frame into thirds both horizontally and vertically. Position your main subject at the intersection of two of these lines. You’ll end up with a more pleasing shot than just putting your subject in the middle of your frame. This is especially true of shots than include the horizon. Put the horizon line either one third from the top, or one third from the bottom. Nothing is more boring that a shot where the horizon divides the frame in two equal halves.
7. Look for the unique angle.
Your perspective will add to the drama of the image. A straight on shot may be best for a straight on subject, but an oblique angle, or shooting up or down on your subject might be the perspective that give you a unique great shot.

8. Take your time.
Consider using a tripod. Unless you’re shooting some frantic action, you have the time to move around your subject, try different angles, and compose carefully, making sure to eliminate distracting elements that may be creeping in on the edges of your frame. Be sure that your horizon line is straight. Slow down.
9. Expose for the main subject.
One of the common errors you see in photographs of people is the camera has exposed for the sunny sky in the background and the people in the foreground are all dark and unrecognizable. That’s where manual exposure comes in. You have to take your exposure reading from your main subject, set it manually, and just let the sky be overexposed. Unless you’re shooting a landscape, who cares about the sky anyway?
10. Break the rules.
Now that you know some rules, break them. Make your photos your own.
P.S. you can check out a lot more of my photos at my Smug Mug site. Just click here.
Just in case you are interested, there's a post here where I talk about the photography equipment I use. Have a look.
This post is part of our Travel Skills for Travelers Over 50 guide, which includes our best photography tips alongside packing, gear, and practical travel advice.
The new site is very nicely laid out. I am looking forward to picking your brain about photography tips. We have a new camera and have no idea what we’re doing!
Just keep shooting Lars. Things will get better as you go.
Some really great tips there, thanks I really need them.` I think the easiest one to remember is the rule of thirds so i shall be practicing that one first.
You’re welcome, Helen. That’s probably the most fundamental of them all. Almost anything else can be fixed in Photoshop.
hee hee that is true, thanks Tom!
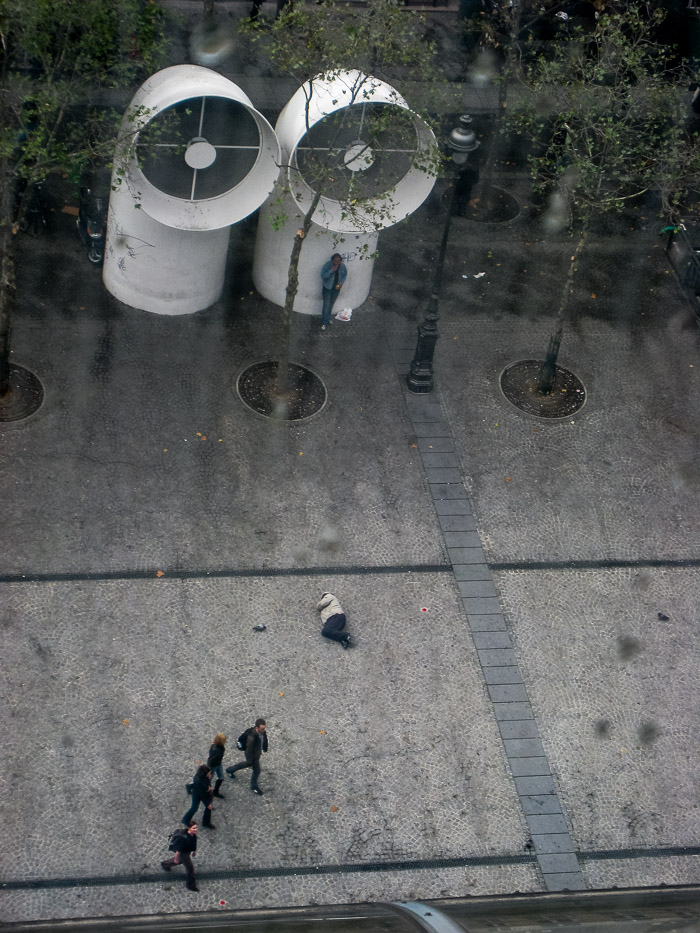
I think a man napping on the ground in the middle of a plaza and someone smoking under a
huge fan that could suck him into oblivion makes that shot interesting.
…the Beatles strolling along the bottom to catch their subway also adds to the charm. So I guess it is the angle. after all…forget the subjects.
It’s all of the above, Ronda, although I would have to say it’s the random composition that struck me the most.
Awesome tips thank you i will put them into action.
Glad they were helpful. BTW, we enjoyed Hoi An very much when we visited a couple years ago.
I have just bought a new camera and so far used it on auto and very little else but you have inspired me to get the manual out and experiment. Thanks.
That is great Lyn. Glad to hear it. My work is done here.
Hi Tom, I run a travel agency in Vietnam so these photo tips really help to promote my tours. Thank you!
Good luck, glad they are helpful.
Thanks, really simple, love the through the window and rain perspective and the idea of searching for different angles.